Astrophotography Mount Modification & Repair
Background & Motivation
One of the biggest challenges I’ve faced in astrophotography is accurately tracking the movement of the night sky over long exposures. The smallest mechanical inaccuracies can introduce tracking errors that become visible in the final image, particularly at the long focal lengths I worked with.
I began this project with the goal of improving the tracking accuracy and reliability of my equatorial mount through a belt-drive conversion. What I initially expected to be a relatively straightforward process proved itself to be significantly more involved, including mechanical repairs, difficult troubleshooting, and precise adjustments.
Belt-Drive Conversion
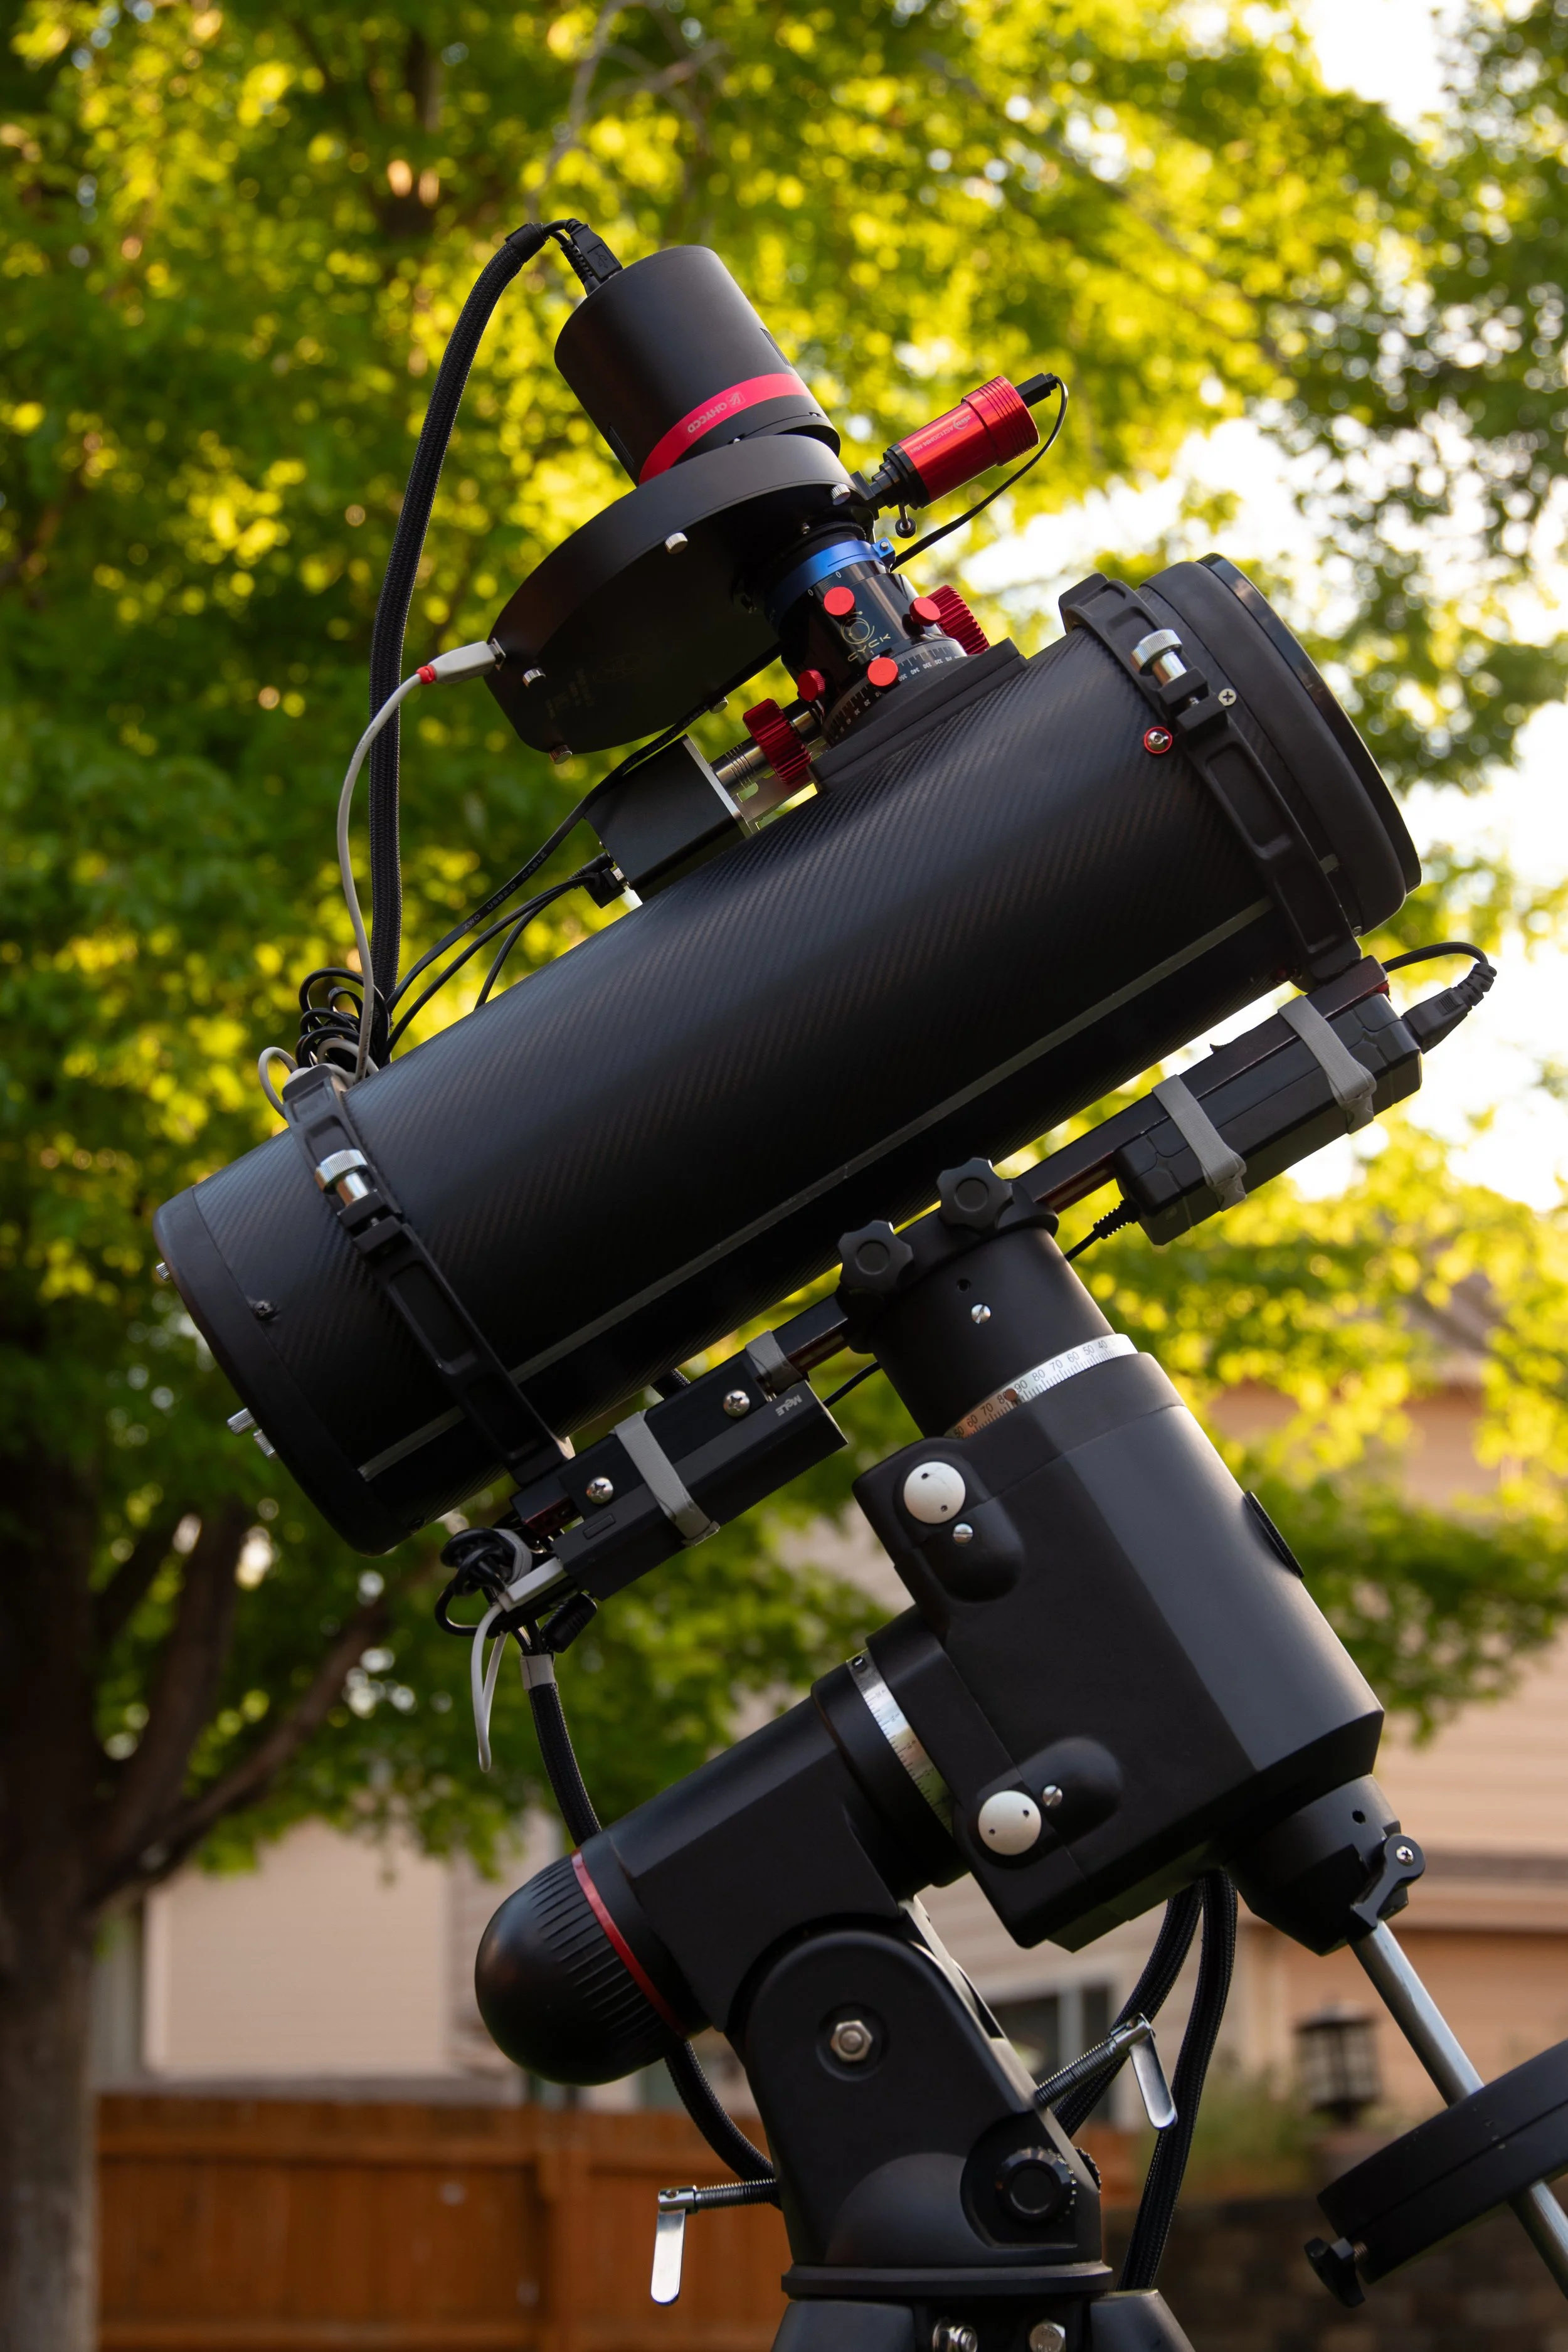
The primary objective was to replace the mount's original gear-driven motor transmission with a timing belt and pulley system, reducing sources of backlash and allowing smoother motion. This involved partially disassembling the mount, removing the existing drive components, and installing and aligning the new pulleys and belts.
Although the conversion itself was supposed to be simple, working with this specific mount revealed several unexpected problems that made reassembly and tuning much more difficult.
Mechanical Challenges & Repairs
One of the most significant obstacles was a backlash adjustment screw that had been stripped and bonded in place, preventing me from properly disassembling the mount. After unsuccessful attempts to remove it non-invasively, I sought out advice from fellow astrophotographers and the CU machine shop, hoping to use a drill press to remove the screw. The assessment I was given was that the housing was likely beyond practical repair, and I was unable to pursue that approach through the shop.
Although discouraging, I wasn't ready to abandon the housing without exploring other options. I ultimately used a much more unconventional approach to drilling out the screw, which made functional and cosmetic repair the next challenge. To restore the mechanical integrity of the housing, I started by expanding and rethreading the original hole. Next, I installed a threaded insert and ensured it was properly aligned before thread locking it, then used a two-part epoxy to fill the material removed by drilling out the screw. The cosmetic restoration was much more simple- I sanded the surface to remove excess epoxy, and spray painted the exterior to match the original paint.
In the end, I was able to successfully recover the adjustment mechanism, and restore the housing to its original appearance and strength. Beyond the technical experience, this taught me the importance of persistence and independently evaluating possible solutions, even when the initial outlook is unfavorable.
Backlash Adjustment & Testing
After completing the modification, properly adjusting the mount's mechanical backlash proved to be another challenge. Minimizing unwanted movement without introducing excessive resistance required careful, incremental adjustments that had to be done in the dark with the mount operating.
I spent considerable time making small changes, testing the mount, and isolating errors to the components that introduced them. Using guiding data to evaluate performance helped me distinguish what adjustments had to be made on the mount, and what needed to be optimized elsewhere, such as telescope collimation or sensor alignment.
Results & Reflections
Through the belt-drive conversion, mechanical repairs, and tuning, I was able to substantially improve the mount's tracking performance. Pre-conversion guiding tests showed errors reaching over 5 pixels over the course of a 3 minute exposure, while post-conversion testing demonstrated sub-pixel tracking accuracy throughout 10 minute exposures.
More importantly, this project taught me how much precision mechanical work depends on understanding the underlying system rather than simply following a procedure. Several of the most difficult problems were ones I hadn't anticipated, and working through them reinforced my interest in mechanical design, troubleshooting, and repairs.
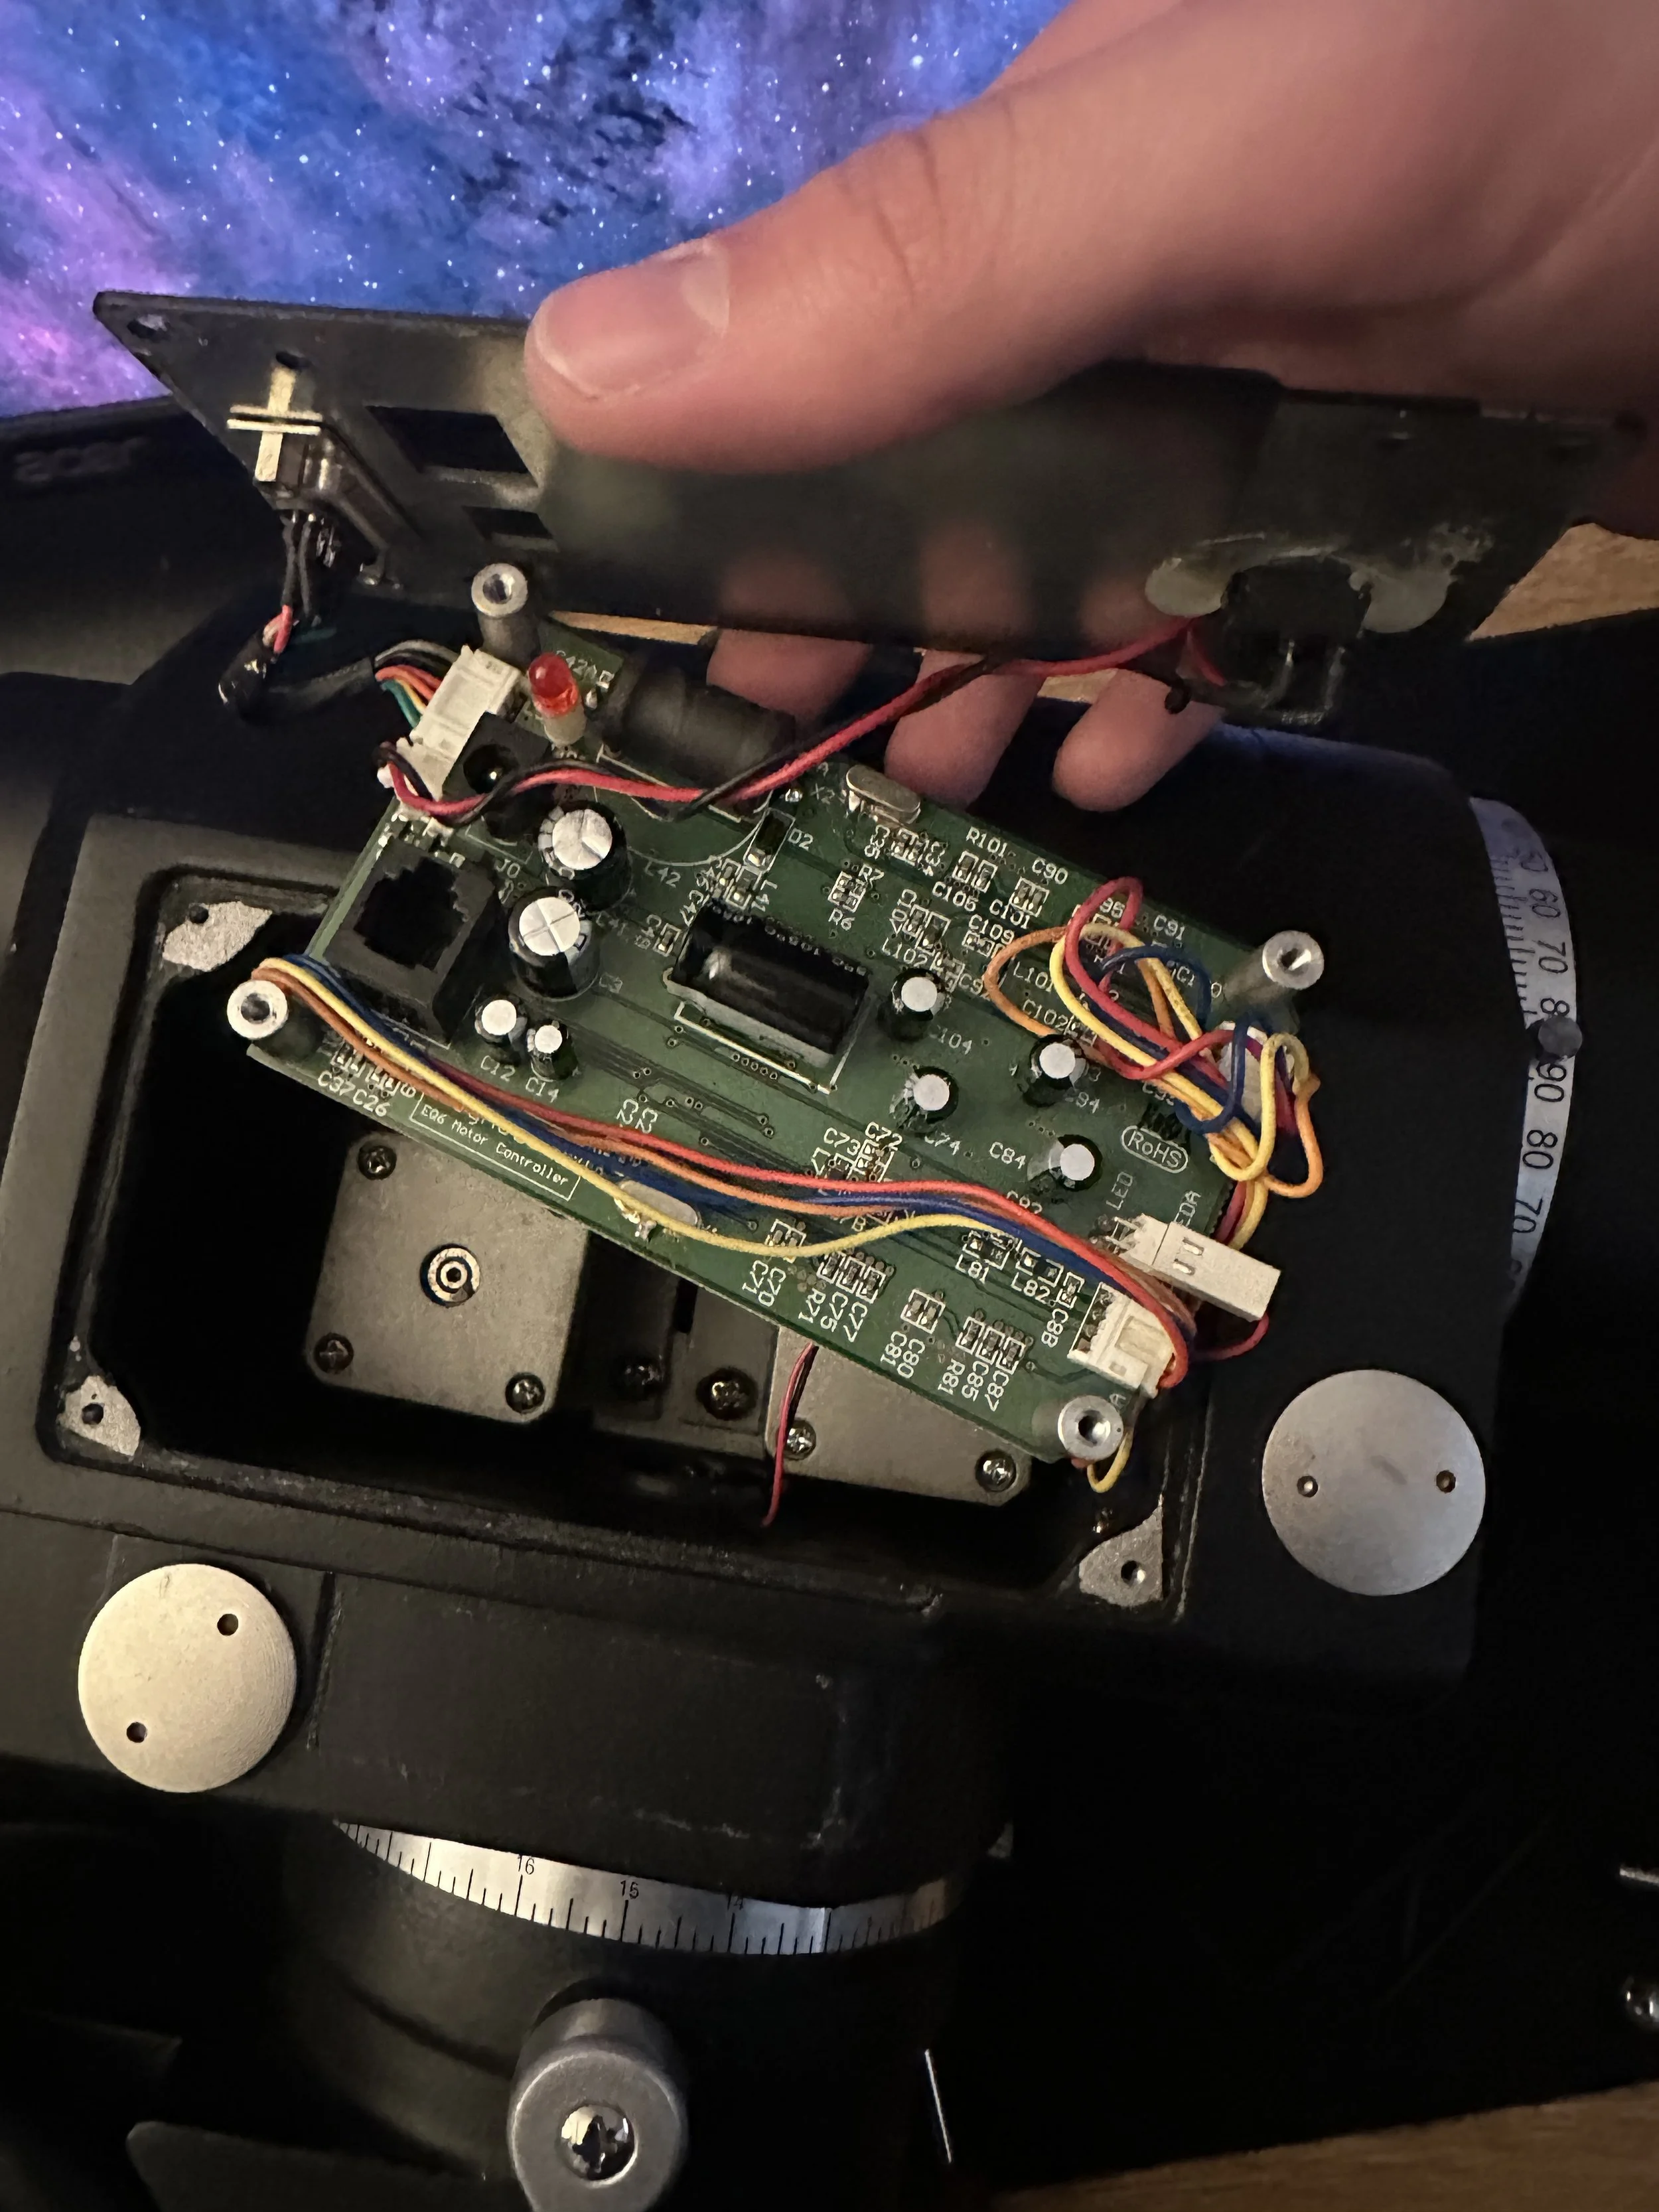
Initial step of disassembly
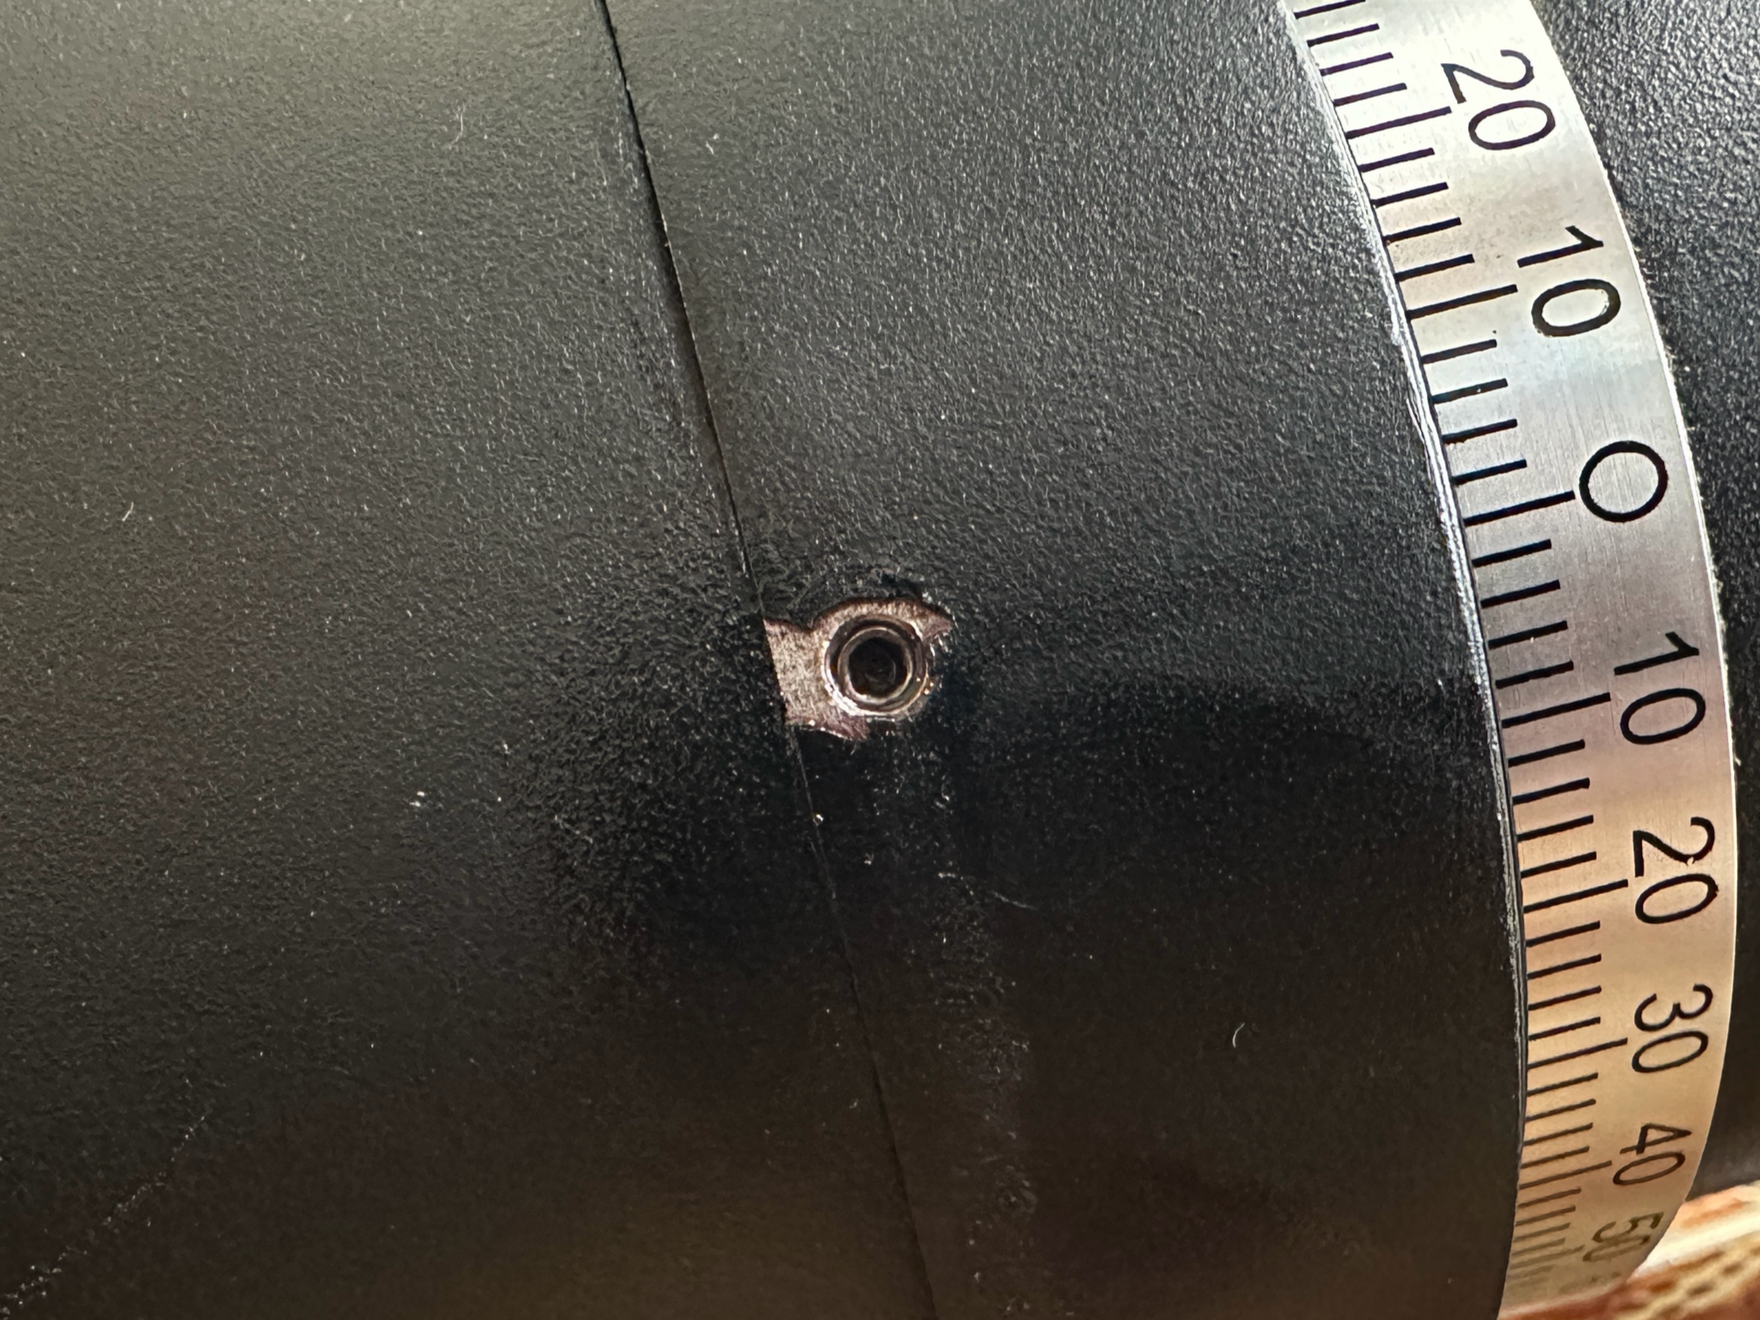
Original stripped, bonded screw
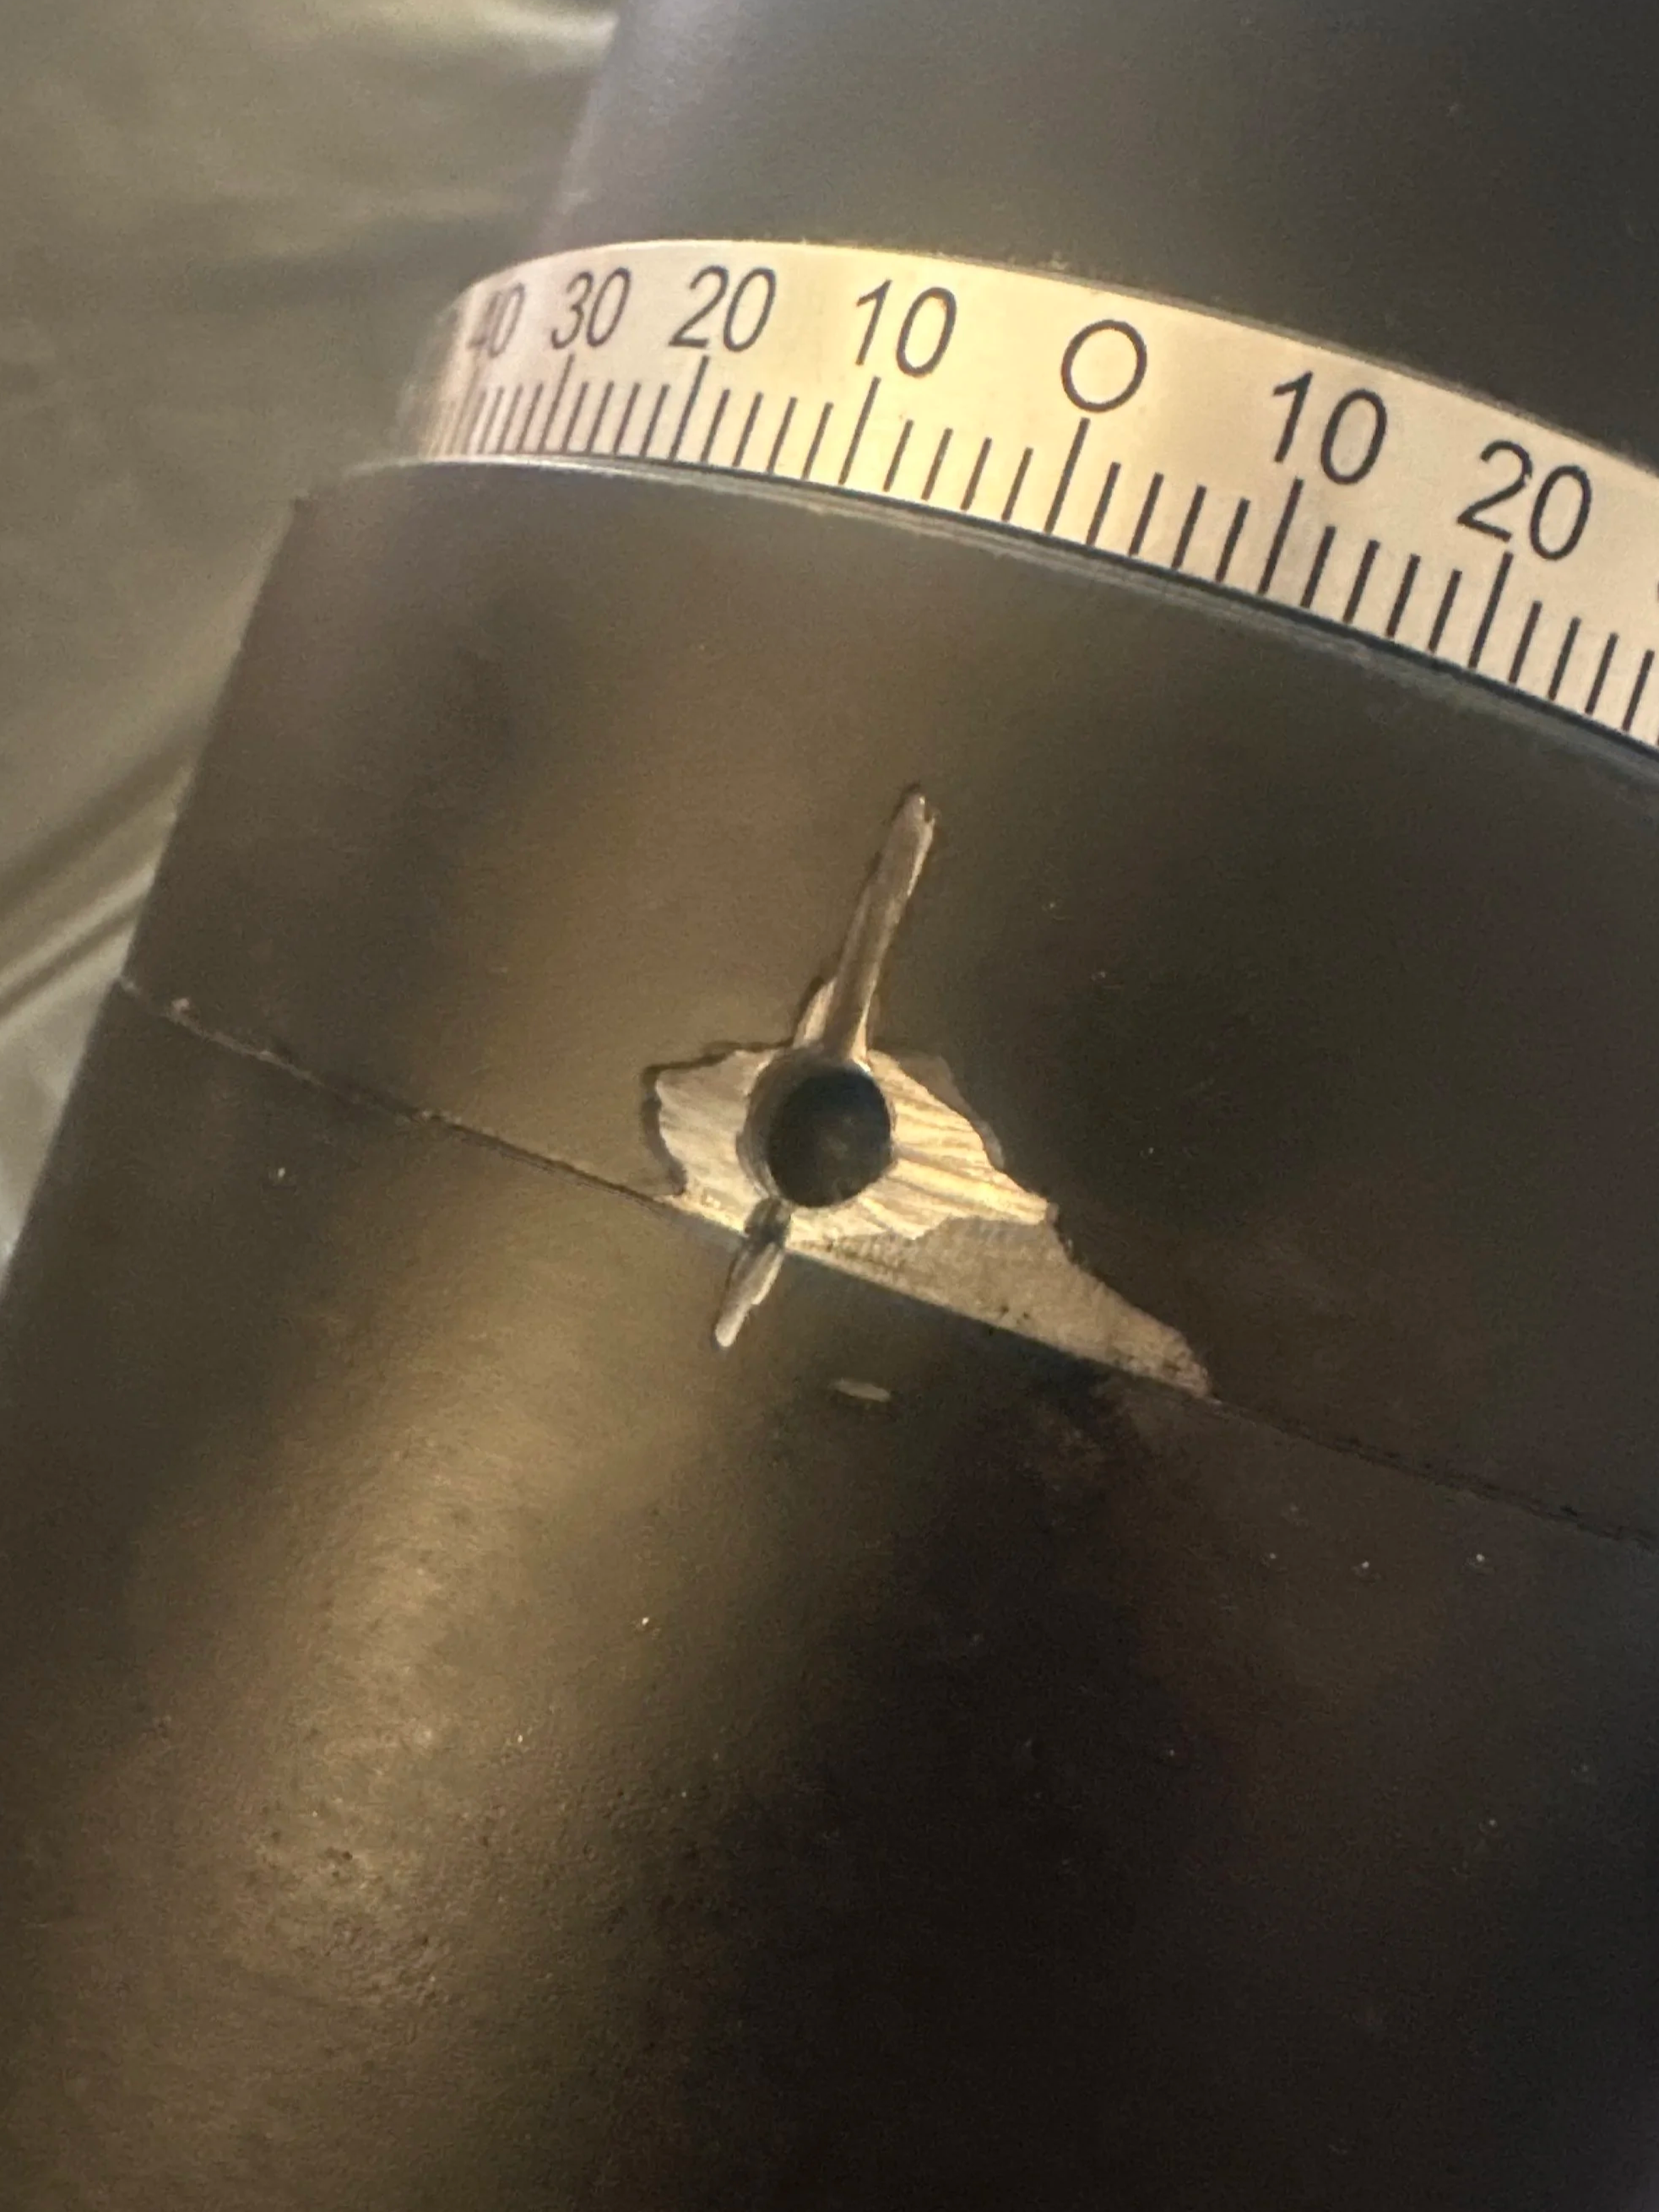
Housing after expansion and rethreading
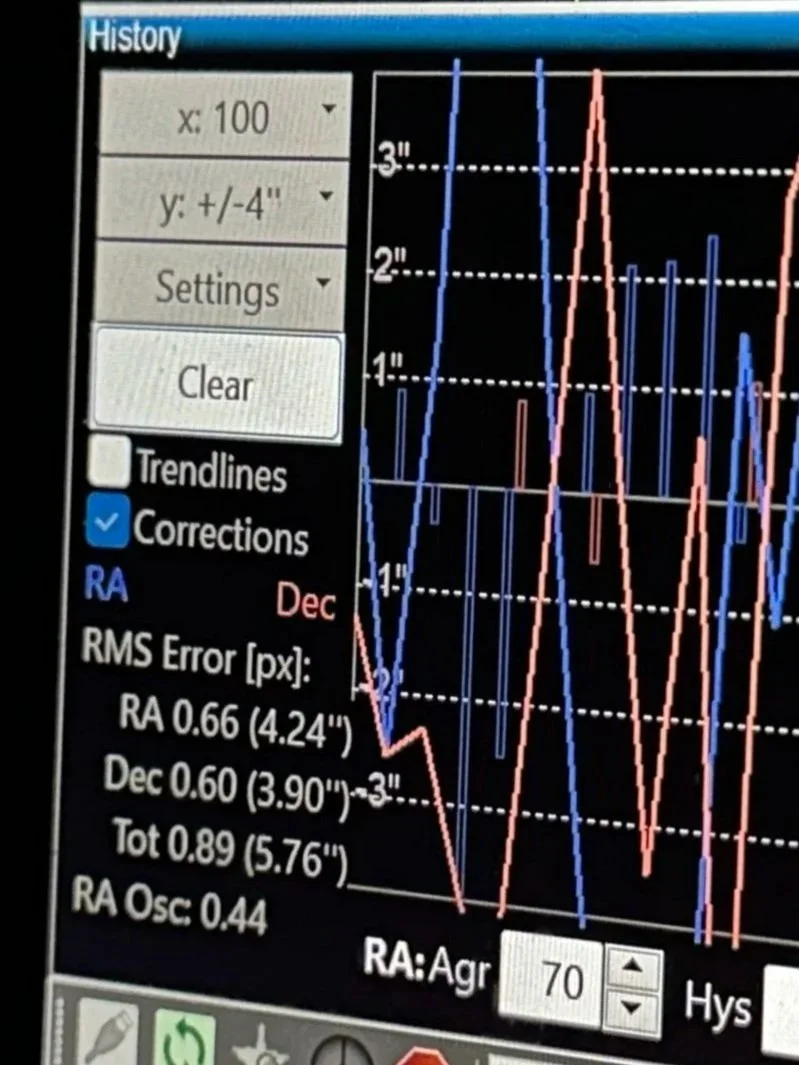
Before modification: Average error of 5.76”
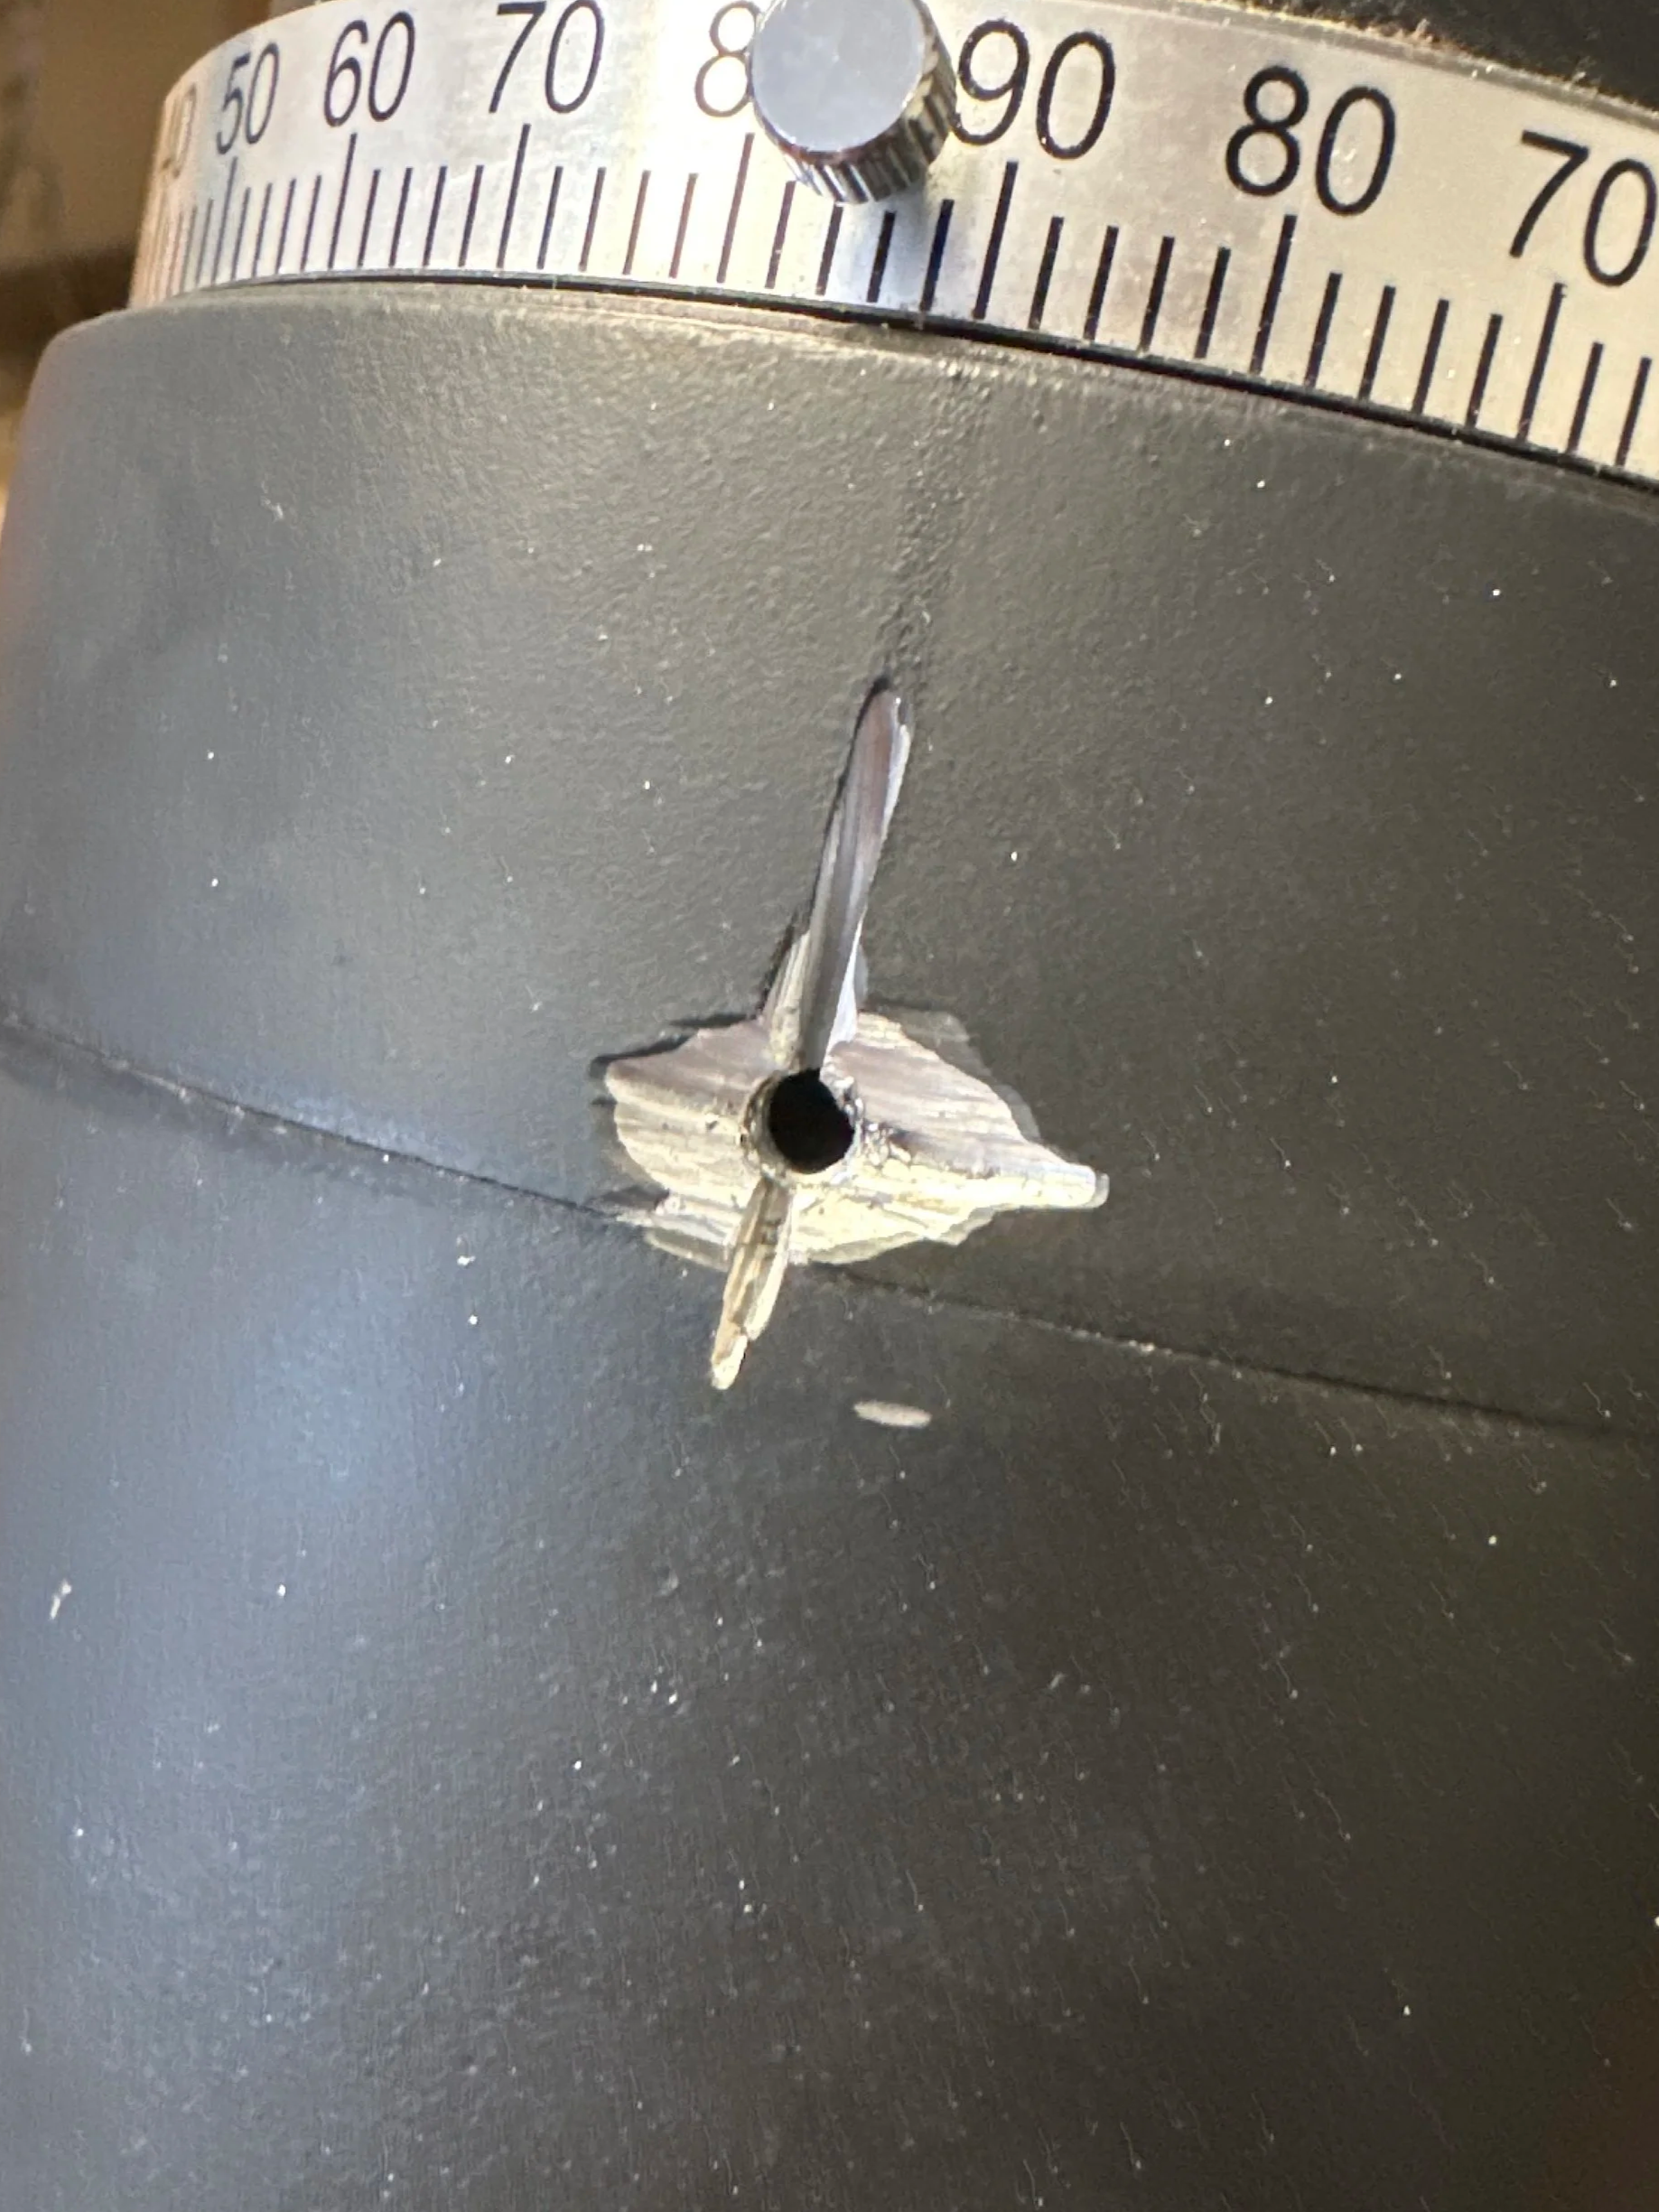
Housing after screw removed
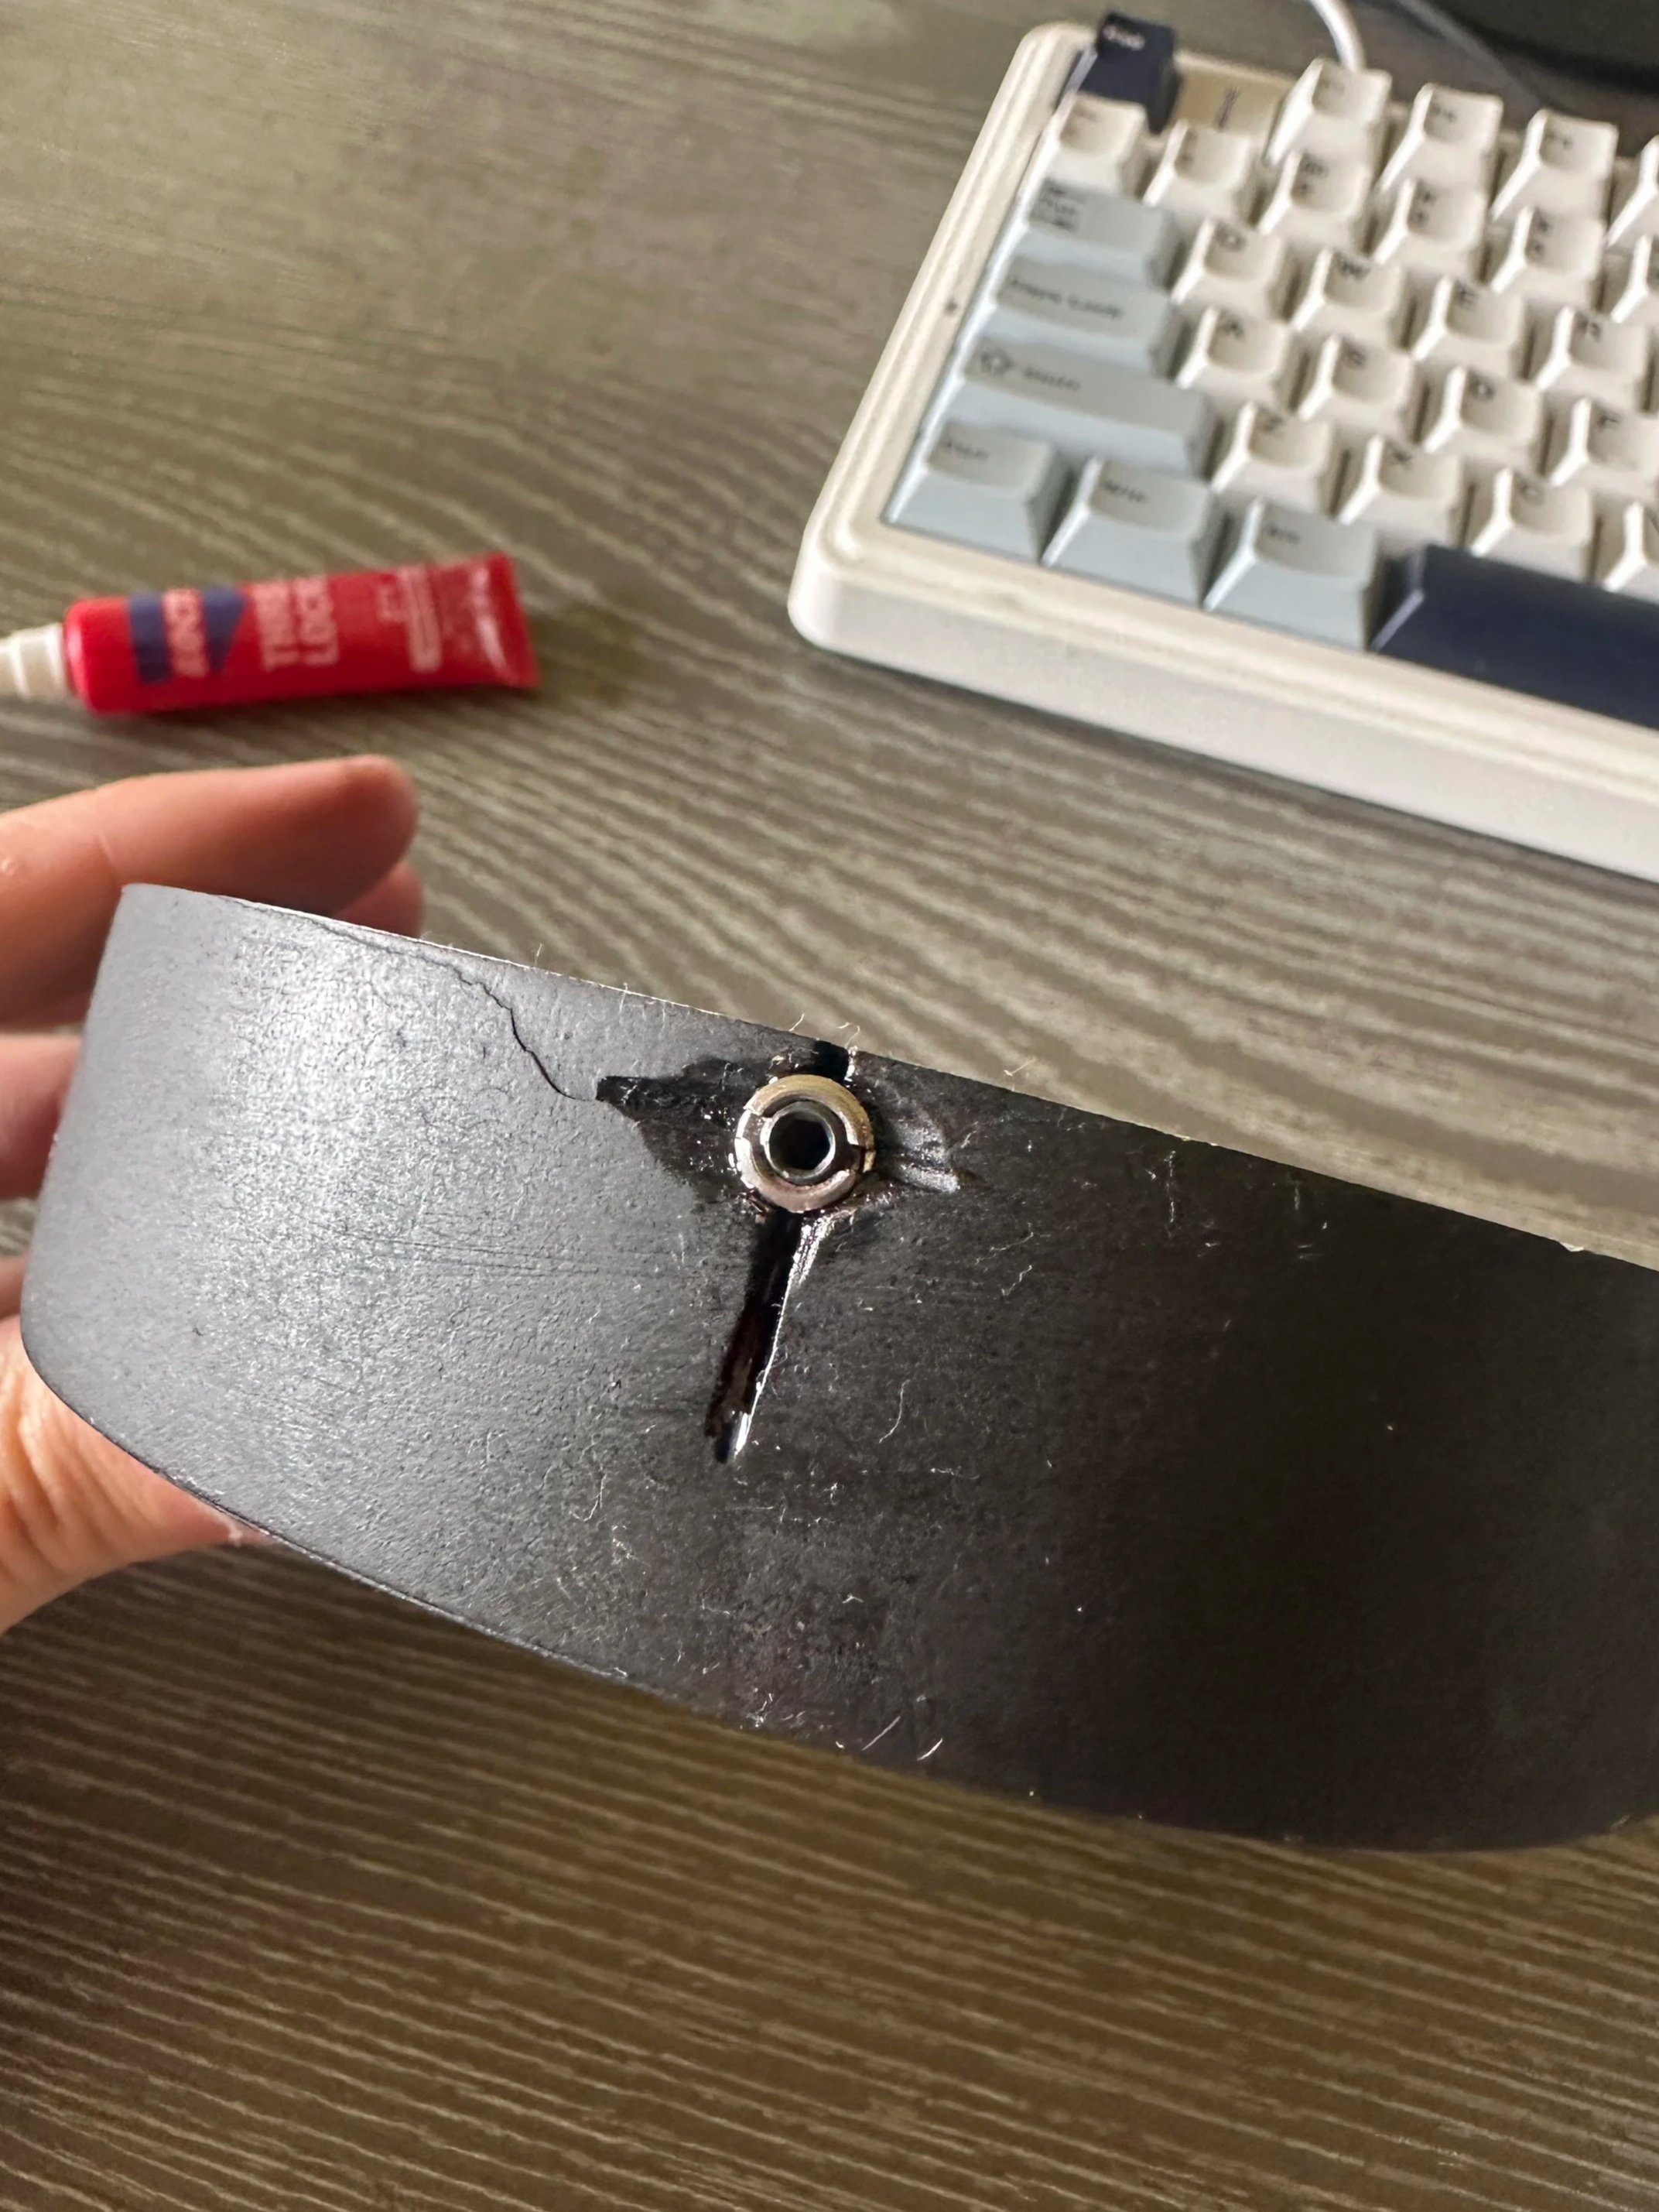
Housing with threaded insert
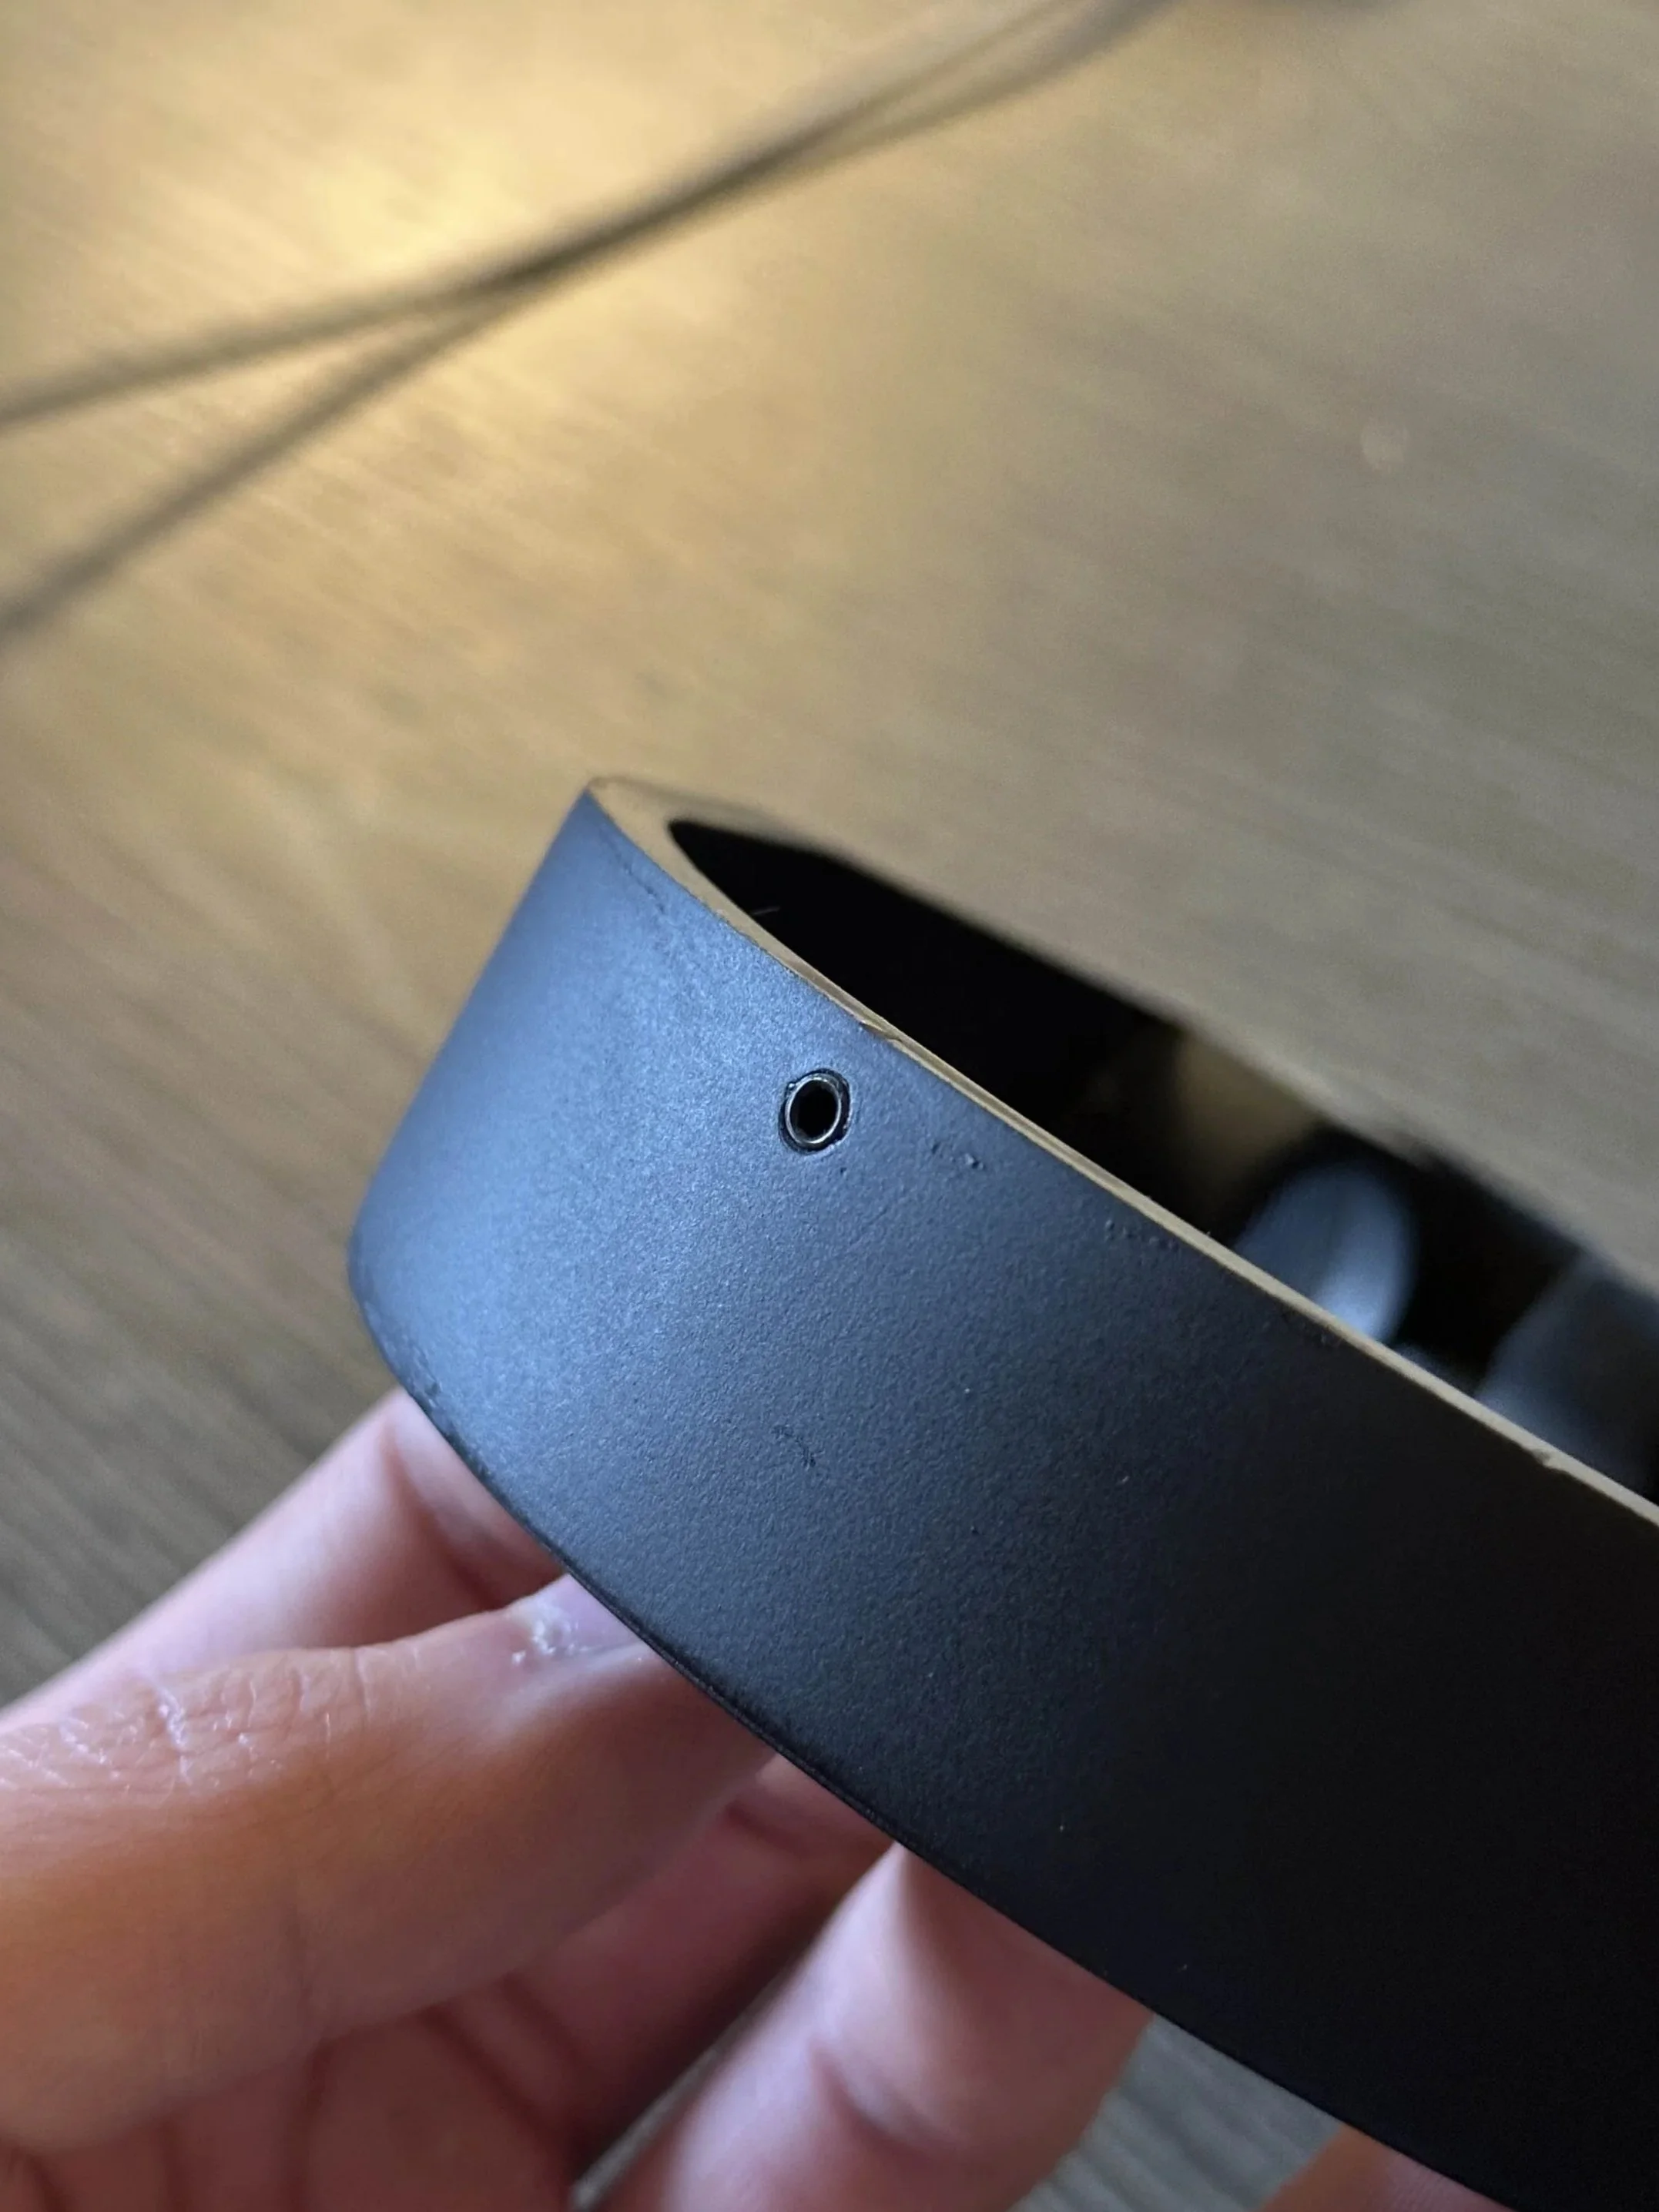
Housing after epoxy, sanding, and repainting
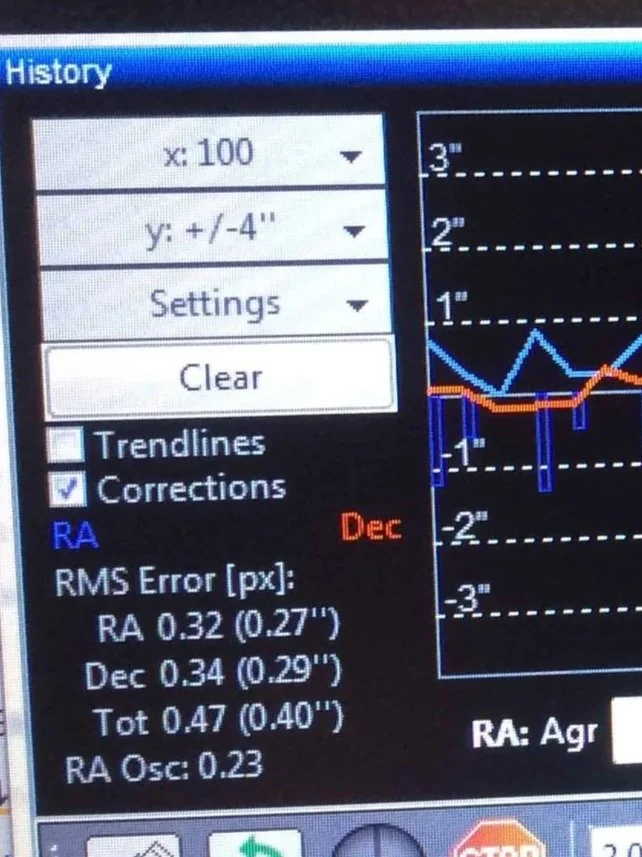
After modification: Average error of 0.40”